Easy Homemade Onion Rings: Your Foolproof Recipe for Beginners
There are few culinary delights as universally loved as a basket of perfectly crispy onion rings. That delightful crunch, followed by the sweet, tender onion, is an irresistible combination that often leaves us craving more. While restaurant versions are tempting, imagine recreating that magic right in your own kitchen – even if you're a complete novice. Making homemade onion rings from scratch is surprisingly simple, incredibly rewarding, and promises a taste that far surpasses anything you'll get from a frozen bag or even many diner establishments. This foolproof recipe will guide you through every step, ensuring you achieve that coveted restaurant-quality crispness and flavor, making "homemade onion rings" your new culinary superpower.
Why Homemade Onion Rings Trump Restaurant Versions
There's a special satisfaction that comes with crafting a beloved dish in your own kitchen, and homemade onion rings are no exception. While the convenience of ordering out is undeniable, taking the time to make them yourself offers numerous advantages. Firstly, freshness is paramount. You control the quality of your ingredients, from the crisp, sweet onions to the type of oil used for frying. This means no mystery oils or artificial additives – just pure, wholesome deliciousness.
Secondly, customization is key. Do you prefer a slightly thicker coating, or perhaps a hint of cayenne pepper for a subtle kick? When you make them at home, you're the master of your onion ring destiny. You can adjust seasonings to your exact preference, ensuring every bite is tailored to your taste buds. Finally, the cost-effectiveness of homemade onion rings is hard to beat. A few simple ingredients transform into a generous batch, perfect for sharing at gatherings, enjoying during a football game, or simply treating yourself to a delightful snack. Plus, the aroma filling your kitchen as they fry is an experience in itself – a promise of the crispy, golden goodness to come.
The Secret to Crispy Perfection: Ingredients You'll Need
Achieving those perfect homemade onion rings isn't about fancy techniques, but rather understanding the role of each ingredient. Our foolproof recipe relies on a few core components, each contributing to that tender interior and shatteringly crisp exterior.
Choosing Your Onion Wisely
The star of the show, of course, is the onion. For the best homemade onion rings, *sweet onions* are your go-to choice. Varieties like Vidalia, Walla Walla, or even a good Spanish onion work beautifully. Their natural sugars caramelize slightly during frying, resulting in a milder, sweeter flavor profile without the harsh "tangy bite" that some stronger onions can possess. While yellow or white onions can be used in a pinch, they might offer a more pungent flavor. Once you've selected your onion, simply remove the top and bottom, peel away the papery skin, and thinly slice it into rings, about 1/4 inch thick. Gently separate the rings, ready for their transformation.
Crafting the Perfect Batter Base
The batter is the crispy shell that encases your sweet onion. Our recipe employs a clever trick to achieve exceptional adhesion and tenderness. You'll need:
*
Milk: Whole milk works best for richness, but any milk (or even a dairy-free alternative like almond or oat milk) will do. This forms the liquid base.
*
Vinegar: A splash of white vinegar or apple cider vinegar reacts with the milk to create a makeshift "buttermilk." This acidic environment tenderizes the batter and helps it cling beautifully to the onion.
*
Egg: An egg acts as a crucial binder, emulsifying the batter and ensuring the dry coating sticks firmly to the onion during the frying process.
*
All-Purpose Flour: This forms the bulk of your crispy coating. For those with dietary restrictions, a good quality gluten-free flour blend can be substituted successfully.
*
Simple Spices: Salt, garlic powder, and black pepper are our foundational flavors. Don't be afraid to experiment with a pinch of paprika, onion powder, or even a tiny dash of cayenne pepper for extra depth!
Essential for Frying: The Right Oil
The choice of oil is critical for achieving that perfect crispness without a greasy finish. You need a neutral-flavored oil with a high smoke point. Excellent options include:
*
Avocado Oil: A healthier choice with a very high smoke point.
*
Safflower or Sunflower Oil: Mild in flavor and widely available.
*
Vegetable or Canola Oil: Economical and effective.
You can also use traditional options like lard or tallow for a richer flavor, though these are less common for beginners. Ensure you have enough oil to submerge the onion rings fully, typically 3-4 inches deep in a heavy-bottomed pot or Dutch oven.
Step-by-Step: Your Foolproof Guide to Crispy Homemade Onion Rings
With your ingredients ready, let's dive into the simple steps to create those irresistible homemade onion rings.
The Double-Dredge Difference
This is perhaps the most important "secret" for achieving restaurant-quality crispiness and ensuring your batter stays put.
1.
Prepare the Wet Mixture: In a medium bowl, combine the milk and vinegar. Stir gently and let it sit for about 5 minutes – this is when the "buttermilk" effect happens. Whisk in the egg until well combined.
2.
Prepare the Dry Mixture: In a shallow dish or pie plate, whisk together the flour, salt, garlic powder, and pepper.
3.
First Flour Coat: Take your separated onion rings and toss them gently in the dry flour mixture. Ensure each ring is lightly coated. This initial dusting creates a dry surface that helps the wet batter adhere perfectly.
4.
Wet Dip: Next, dip the flour-coated onion rings into the milk-egg mixture. Let any excess liquid drip off for a moment.
5.
Second Flour Coat: Immediately transfer the wet onion rings back into the dry flour mixture. Press gently to ensure a thorough coating, making sure every surface is covered. Place the fully coated rings on a clean plate or tray, ready for frying. Don't overcrowd them; give them space.
Frying Fundamentals: Temperature is Key
This step requires a little patience and attention, but it's where the magic truly happens.
1.
Heat the Oil: Pour your chosen oil into a large, heavy-bottomed pot or Dutch oven. Heat the oil over medium-high heat. The *crucial* part here is monitoring the temperature. Use a deep-fry thermometer to keep the oil consistently between
350-375°F (175-190°C).
*
Too Cool (below 350°F): If the oil isn't hot enough, the onion rings will absorb too much oil, becoming greasy and soggy instead of crispy.
*
Too Hot (above 375°F): If the oil is too hot, the batter will burn quickly on the outside before the onion inside has a chance to cook and tenderize properly.
2.
Fry in Batches: Avoid overcrowding the pan! Frying too many onion rings at once will drastically drop the oil temperature, leading to greasy results. Fry in small batches, usually 4-6 rings at a time, depending on the size of your pot.
3.
Cook to Golden Perfection: Carefully lower the coated onion rings into the hot oil using tongs. Fry for about 2-4 minutes per batch, flipping them once, until they are beautifully golden brown and crispy.
4.
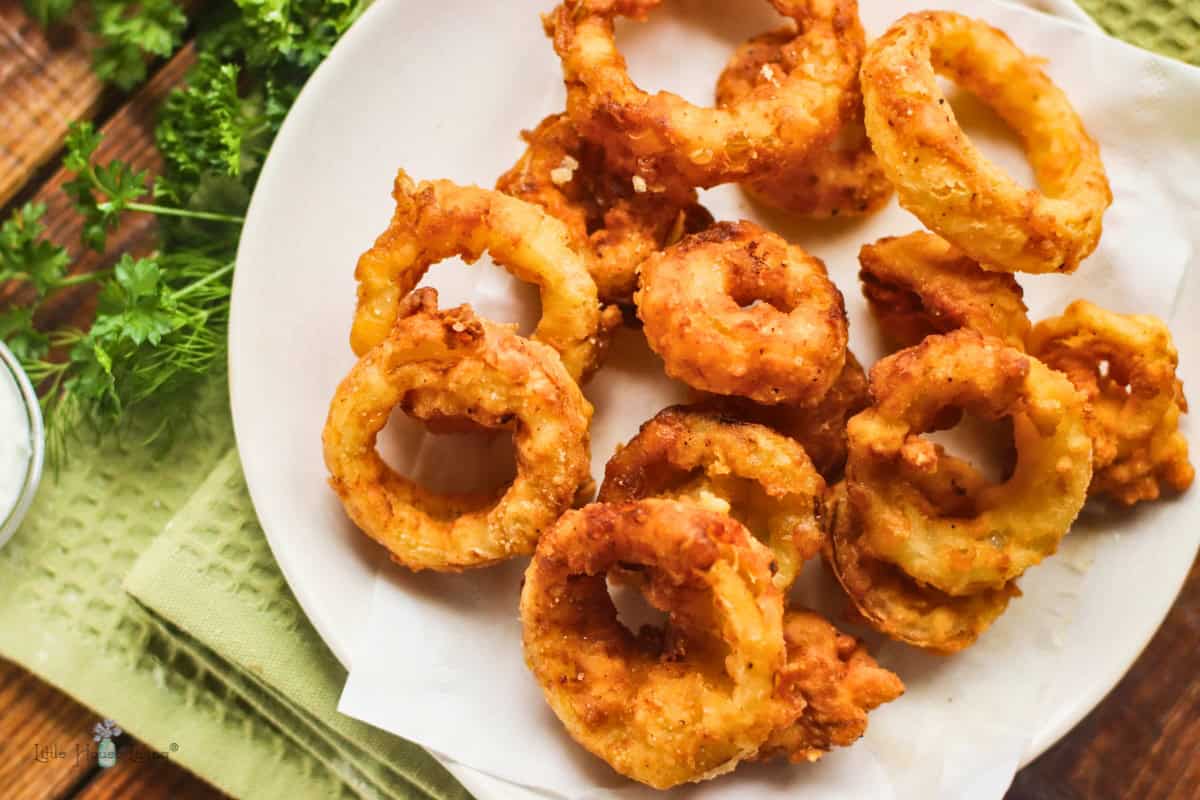
Drain: Once cooked, remove the onion rings with a slotted spoon or spider and transfer them to a wire rack set over a baking sheet lined with paper towels. This allows excess oil to drain off and helps maintain their crispness. Sprinkle with a little extra salt immediately after removing them from the oil.
5.
Repeat: Continue frying the remaining batches, making sure the oil temperature returns to the ideal range between each batch.
For more advanced tips on maintaining oil temperature and achieving superior crispness, you might find valuable insights in
Master Crispy Homemade Onion Rings: Better Than Any Restaurant.
Beyond the Fryer: Serving Suggestions and Storage Tips
Once your batch of hot, fresh, and crunchy homemade onion rings is ready, the possibilities are endless! They are a fantastic standalone snack, perfect for munching on while watching a game or simply enjoying a lazy afternoon.
As a side dish, they are a phenomenal pairing for classic American comfort food. Think alongside juicy hamburgers, crispy chicken sandwiches, slow cooker pulled pork, or any type of BBQ. They also make an incredibly delicious alternative to French fries, especially when served with a generous dollop of ketchup, ranch dressing, or even a spicy aioli. Don't limit them to just sides; try them as a fun, crunchy salad topper for an elevated texture experience.
Can You Freeze Homemade Onion Rings? Absolutely!
One of the best tips for making homemade onion rings is knowing how to store them for later enjoyment. If you've made a large batch or want to prepare them ahead of time, freezing is a fantastic option. Here's how:
1. After coating the onion rings (but before frying), arrange them in a single layer on a parchment-lined baking sheet.
2. Place the baking sheet in the freezer for 1-2 hours, or until the rings are completely frozen solid. This prevents them from sticking together.
3. Once frozen, transfer the solid onion rings to a freezer-safe bag or airtight container. They can be stored for up to 2-3 months.
When you're ready to enjoy them, simply fry them directly from frozen, adding a couple of extra minutes to the cooking time until golden and crispy. This clever trick means you're always just minutes away from a hot, fresh batch! For more advanced techniques on preparation and freezing, you might want to
Unlock the Secret to Perfect Crispy Onion Rings at Home.
Conclusion
There you have it – a truly foolproof recipe for beginners to create incredible homemade onion rings that rival, and often surpass, their restaurant counterparts. From selecting the perfect sweet onion to mastering the double-dredge and understanding the critical role of oil temperature, you now possess all the secrets to achieving crispy, flavorful perfection every time. So go ahead, gather your ingredients, follow these simple steps, and prepare to impress yourself and everyone lucky enough to share in this utterly addictive snack or side dish. Happy frying!