Mastering the Art of Crispy Homemade Onion Rings: Beyond Restaurant Quality
There's something undeniably magical about a perfectly crafted onion ring. That irresistible crunch, the delicate sweetness of the onion, and the savory coating all combine in a symphony of flavor and texture that can elevate any meal or transform a simple snack into an occasion. While many of us have a go-to restaurant for our onion ring fix, imagine creating homemade onion rings that aren't just good, but are genuinely *better* than anything you've ever ordered out. Forget soggy, greasy imitations – we're talking about achieving golden-brown, shattering crispiness with every bite, a tender onion interior, and a flavor profile that will make your taste buds sing. This comprehensive guide will equip you with the secrets to making truly exceptional homemade onion rings, turning a beloved diner staple into a gourmet delight right in your own kitchen.
Whether you're looking for an impressive appetizer for a gathering, a fun snack for game day, or the ultimate sidekick to your favorite burger or BBQ dish, these homemade onion rings are destined to become your new culinary obsession. The process is surprisingly straightforward: slice, dip, and fry. But as with all great culinary endeavors, the devil is in the details. We'll dive deep into those crucial details, revealing foolproof techniques and ingredient insights that guarantee crispy perfection every single time.
The Essential Ingredients: Building Blocks of Better-Than-Restaurant Rings
Crafting the perfect onion ring starts with understanding the role of each ingredient. Quality and preparation here are paramount.
- The Onions: Sweetness is Key
For truly superior onion rings, sweet varieties are your best friend. Think Vidalia, Walla Walla, or Maui onions. Their naturally milder flavor means less of that pungent, tangy bite from sulfur, allowing the onion's inherent sweetness to shine through once cooked. When preparing, remove the top and bottom, peel off the papery skin, and then slice them into even, approximately ¼-inch thick rings. Consistency in thickness ensures they cook uniformly. Gently separate the rings before you begin the battering process. - The Buttermilk-Style Batter Base: Adhesion and Tenderness
This isn't just about coating; it's about creating the perfect environment for crispiness. Our wet mixture cleverly mimics buttermilk, which is fantastic for tenderizing and aiding adhesion. You'll combine milk (any kind works, including dairy-free alternatives if needed) with a touch of vinegar (white or apple cider). Allow this mixture to sit for about five minutes to curdle slightly. This minor chemical reaction works wonders. Finally, whisk in an egg, which acts as a crucial binder, ensuring the subsequent dry coating sticks firmly to your onion slices. - The Crispy Dry Dredge: Flavor and Texture Powerhouse
This is where the magic of the crunch truly happens. Your dry mixture will be a simple yet effective blend of all-purpose flour (gluten-free flour can be substituted if necessary), salt, garlic powder, and black pepper. While this blend might seem basic, the garlic powder adds an aromatic depth that complements the sweet onion beautifully without overpowering it. This seasoned flour forms the foundational crispy crust. - The Frying Oil: High Smoke Point is Non-Negotiable
Choosing the right oil is as important as the onions themselves. You need a neutral-flavored oil with a high smoke point to withstand the necessary frying temperatures without breaking down or imparting off-flavors. Excellent choices include avocado oil (a healthier option), safflower oil, canola oil, or vegetable oil. For a truly old-fashioned flavor, some chefs swear by lard or tallow. Ensure you use enough oil to fully submerge the onion rings for proper deep frying.
The Double-Dredge Technique: Your Secret to Ultimate Crispiness
This is where many home cooks go wrong, and where you'll distinguish your homemade onion rings from the rest. The secret to that thick, crunchy coating that stays put is the double-dredge method:
- First Flour Coat: Begin by lightly dusting your separated onion rings in the dry flour mixture. This initial thin coating provides a dry surface for the wet batter to adhere to, preventing it from slipping off.
- Wet Dip: Dip the flour-dusted onion ring into the buttermilk-style wet mixture, letting any excess liquid drip off.
- Second Flour Coat: Immediately transfer the wet onion ring back into the dry flour mixture. This time, gently press the flour onto all surfaces of the onion ring, ensuring a generous and even coating. Don't be shy here; this is what creates that satisfying crunch.
- Resting Period: Once coated, place the onion rings on a wire rack set over a baking sheet. This allows any excess moisture to evaporate slightly and helps the coating to set, making it more resilient during frying. This step is often overlooked but contributes significantly to crispness.
Mastering the Fryer: Temperature Control and Batch Frying are Crucial
Frying can seem intimidating, but with a few key principles, you'll be frying like a pro. These tips are the difference between greasy, soggy rings and light, crispy perfection.
- Oil Temperature is Everything: This cannot be stressed enough. The ideal temperature range for frying onion rings is consistently between 350-375°F (175-190°C).
- Too Cool: If your oil temperature drops too low, the onion rings will absorb excessive oil, becoming heavy, greasy, and disappointingly soggy. The batter won't crisp up properly.
- Too Hot: Conversely, if the oil is too hot, the batter will quickly burn to a dark brown or black before the onion inside has a chance to cook through or become tender. You'll end up with a burnt exterior and a raw interior.
The Solution: Use a thermometer! A candy thermometer or a deep-fry thermometer clipped to the side of your pot is an indispensable tool. Monitor the temperature closely and adjust your heat as needed. - Avoid Overcrowding the Pan: It's tempting to try and fry all your onion rings at once, but resist the urge! Overcrowding dramatically drops the oil temperature, leading back to the "too cool" problem. Fry your onion rings in small batches, giving each ring ample space. This ensures the oil temperature remains stable, allowing each onion ring to cook evenly and achieve maximum crispiness.
- Don't Overcook: Onion rings cook relatively quickly. They should be fried until they are a beautiful golden brown. Overcooking will lead to a darker, tougher crust and potentially burnt flavors.
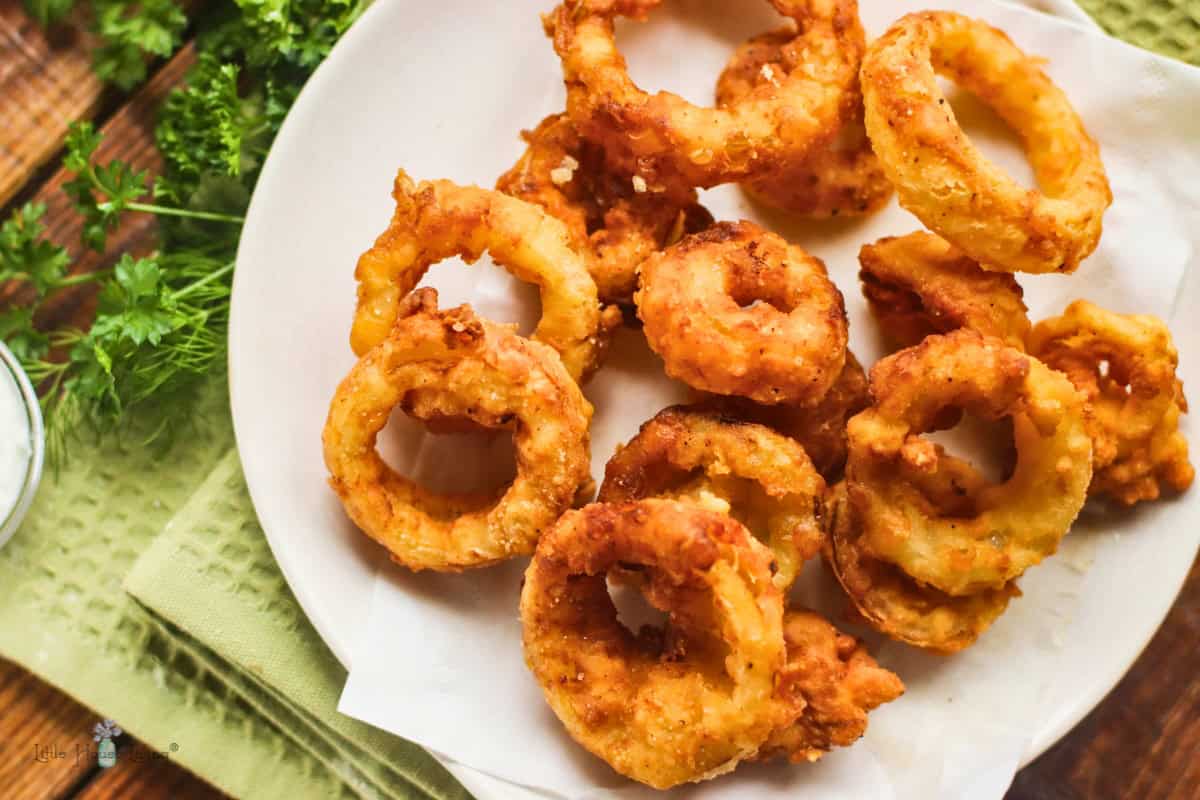
- Draining: Once golden, use tongs or a spider strainer to carefully remove the onion rings from the oil. Place them immediately on a wire rack set over paper towels to drain any excess oil. This helps maintain their crispness. Season immediately with a sprinkle of salt while they're hot.
Serving Suggestions & The Secret to Freezing Homemade Onion Rings
Freshly fried homemade onion rings are best enjoyed immediately, straight from the wire rack. Their versatility means they can grace almost any meal:
- Classic Companions: Pair them with juicy hamburgers, slow cooker pulled pork sandwiches, or any BBQ spread.
- Creative Uses: Try them as a surprising and delightful salad topper, or serve them alongside your breakfast eggs for a savory twist.
- Dipping Delights: Ketchup is a classic, but don't shy away from homemade ranch, spicy mayo, honey mustard, or even a tangy barbecue sauce.
And now, for a truly game-changing secret: you can freeze homemade onion rings for future enjoyment! This allows you to do all the prep work ahead of time and have restaurant-quality onion rings ready to fry whenever a craving strikes. Here's how:
- After coating the onion rings using the double-dredge method and resting them on a wire rack, arrange them in a single layer on a parchment-lined baking sheet.
- Place the entire baking sheet in the freezer for about 1-2 hours, or until the onion rings are completely frozen solid. This "flash freezing" prevents them from sticking together.
- Once frozen, transfer the solid onion rings to a freezer-safe bag or airtight container. They can be stored in the freezer for up to 3 months.
- When ready to enjoy, simply fry them from frozen, following the same oil temperature and batch frying guidelines. You might need to add an extra minute or two to the frying time.
Conclusion
Making crispy homemade onion rings that surpass any restaurant offering isn't just a dream; it's an achievable reality with the right techniques and a little bit of patience. By focusing on quality ingredients, mastering the double-dredge technique, and meticulously controlling your oil temperature, you'll consistently produce golden, crunchy, and utterly addictive onion rings that will impress everyone who tries them. So, gather your ingredients, fire up your fryer, and get ready to transform a simple onion into a culinary masterpiece. Your journey to truly exceptional homemade onion rings starts now!
